


How To Paint RV Cabinets
Anthony DayThis article may contain affiliate links where we earn a commission from qualifying purchases. The images and content on this page may be created by, or with the assistance of, artificial intelligence, and should be used for entertainment and informational purposes only.
Key Takeaways
- The right paint for your cabinet's material is essential for a successful outcome.
- Proper preparation and using the correct tools will ensure a smooth painting process.
- Following the painting procedures will result in a stunning, long-lasting finish on your RV.
Transform your RV's interior with a fresh coat of paint on its cabinets. Learn easy steps to revamp your space effectively.
To paint RV cabinets, first remove hardware and clean surfaces. Sand lightly, then apply a primer designed for laminate. Choose a latex or acrylic paint in your desired color, apply two coats for best results, and reattach the hardware once dry.
As an expert in RV renovations, I've transformed countless cabinets, tailoring each project to the unique style of the RV owner. The right cabinet paint can do wonders. It's not just about the color; it’s about choosing the perfect finish and technique. I’ve seen firsthand how a well-executed paint job can elevate your RV's interior from mundane to magnificent.
How To Paint RV Cabinets
Transforming the interior of your RV can be as simple as painting the cabinets. Giving your RV cabinetry a fresh coat of paint is not only a great way to update its appearance, but it also allows you to personalize your space to match your style.
Before you dive into painting, it is crucial to understand the material your cabinets are made of and ensure that you adequately prepare your workspace. This includes cleaning your cabinets and removing hardware such as handles, drawer stops, and cabinet doors.
Tools and Equipment
In this section, we’ll cover the essential tools and equipment needed to paint your RV cabinets. We will discuss the importance of choosing the right paint brush, understanding rollers, and utilizing paint sprayers for a perfect paint job.
Choosing the Right Paint Brush
Selecting the correct paintbrush is an important decision when painting RV cabinets. A good quality paintbrush helps to avoid brush strokes and provides a smooth finish.
Consider the following factors when selecting a paintbrush:
- Bristle Type: Synthetic bristles work well with water-based paints like latex paint, whereas natural bristles should be used with oil-based paints.
- Size: Use smaller brushes for detailed work and larger brushes for larger surfaces. A 2-3 inch angled brush works well for most cabinet doors and edges.
- Shape: An angled brush allows for greater control when painting edges and corners.
Understanding Rollers

Rollers
Rollers come in handy when you need to cover larger surfaces quickly and evenly. When painting RV cabinets, you may find foam rollers to be particularly useful as they provide a smoother finish on flat surfaces.
Consider the following factors when selecting rollers:
- Nap Length: Shorter nap lengths (1/8 to 1/4 inch) are suitable for smoother surfaces like cabinet doors, while longer nap lengths (3/8 to 1/2 inch) are better for textured surfaces such as camper walls.
- Roller Material: Foam rollers work well with water-based paints like latex or acrylic, offering a uniform finish with minimal texture.
Utilizing Paint Sprayers

Paint Sprayer
For a truly professional finish, consider using a paint sprayer when painting your RV cabinets. Paint sprayers apply an even coat of paint and speed up the painting process, making them ideal for large projects like RV renovations.
Some advantages of using a paint sprayer on your cabinets include:
- Efficiency: A paint sprayer can cover a large area quickly, reducing the overall time spent painting.
- Uniform Coverage: The fine mist created by the sprayer ensures an even coverage without brush strokes or roller marks.
- Versatility: Paint sprayers can be used with a range of paint types, including latex, oil-based paints, and some primers.
Painting Procedure
Painting your RV cabinets can give your motorhome a new and fresh look. This section will guide you through the process of how to paint RV cabinets, from preparation to ensuring the paint is fully cured. By following these steps, you can achieve a professional-looking paint job that will last for years.
How To Paint The Cabinets
Before you start painting your RV cabinets, it's essential to prep the surfaces properly to ensure a long-lasting paint job. First, you should remove all cabinet doors and hardware like handles or drawer stops.
You can clean the cabinets with a Thetford RV cleaner to remove any dirt and grease. Sand the surfaces lightly using fine-grit sandpaper to allow for better paint adhesion, and clean off any dust with a damp cloth.
Once your cabinets are clean and sanded, it's time to apply a primer to help the paint stick to the cabinets better. An oil-based primer is recommended for its durability and strong adhesion properties.
After the primer has dried, you can apply the first coat of paint to the cabinets using a good quality roller or a paint sprayer for a smoother finish, making sure to focus on even coverage. Allow the paint to dry before applying the second layer, lightly sanding between coats to ensure a smooth finish.
Applying the Top Coat
Once the paint on your RV cabinets has dried, you should apply a top coat to seal and protect the painted surfaces. A semi-gloss or satin clear coat is recommended for its durability, ease of cleaning, and overall finish.
Use the same method you used for applying the paint, either with a quality roller, brush, or paint sprayer. Allow the top coat to dry before reattaching the cabinet doors and hardware to their original positions.
Ensuring the Paint is Fully Cured
The final step in the process of painting your RV cabinets is making sure the paint has had enough time to fully cure before using the cabinets.
This can vary depending on the specific paint and topcoat products you have chosen – refer to the manufacturer's instructions for an accurate curing time. Generally, latex paint takes around two to four weeks to fully cure, while oil-based paints may require up to 30 days.
During the curing process, it's essential to avoid any heavy usage of the cabinets or putting excessive weight on the painted surfaces. Once the paint has fully cured, you can enjoy your beautifully painted RV cabinets and the fresh new look of your motorhome.
Choosing The Right Type of Paint
When it comes to how to paint RV cabinets, selecting the right type of paint is crucial for a long-lasting finish on your kitchen cabinets.
Understanding Different Types of Paint
There are several types of paint options for painting camber cabinets. Here, we'll discuss acrylic latex paint, oil-based paint, chalk paint, and top-coat selection.
Acrylic Latex Paint

Acrylic Latex Paint
Acrylic latex paint is a popular choice for its easy application, fast drying time, and low odor. It's a water-based paint, making cleanup a breeze. You can choose from a variety of finishes, such as satin, eggshell, or semi-gloss, depending on your preference.
However, always ensure you do the proper prep work before applying latex paint to your RV cabinets for the best results.
Oil-Based Paint
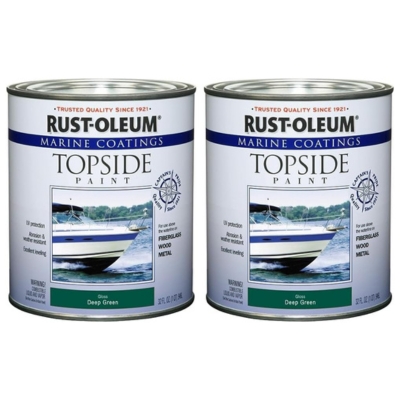
Rust-Oleum Marine Coatings
Oil-based paint is a durable choice for RV cabinets. Cleaning it is simple, and it usually doesn't show brush marks when painting. Additionally, it often needs fewer layers compared to latex paint. However, oil-based paint does have a strong odor, so make sure to wear a mask while working with this type of paint.
Chalk Paint

Magicfly 15 Pcs Chalk Paint Set
Chalk paint is yet another option for painting your RV cabinets. It leaves a matte finish and creates a rustic, vintage look. The benefit of using chalk paint is that it adheres well to most surfaces, requiring minimal sanding and priming.
It's also easy to distress if you're going for a shabby-chic look. On the downside, chalk paint typically requires a sealing top coat since it can be prone to chipping or wearing.
Top-Coat Selection
Choosing the right top coat is essential for a durable and long-lasting paint job on your RV cabinets. Depending on the type of paint you've used, you can opt for a clear coat, matte finish, or even a semi-gloss top coat.
A clear coat adds a layer of protection to your cabinets, making them more resistant to scratches and wear. Satin or semi-gloss finishes provide a smooth sheen, enhancing the appearance of your cabinets.
Understanding The Cabinet's Material
Before you start painting your RV cabinets, it is essential to understand the material of your cabinets. This will help you choose the appropriate paint and technique for a successful paint job.
Solid Wood Cabinets
Solid wood cabinets are made from a single piece of wood or multiple pieces of wood glued together. They are known for their durability and natural wood grain, making them a popular choice for many RV owners.
To paint solid wood cabinets, you will need to prep the surface by lightly sanding it to ensure the paint adheres properly. Since solid wood cabinets are porous, using a good quality primer is crucial for a long-lasting paint job. Oil-based primers are recommended for their ability to seal the wood and provide a strong base for the paint.
Laminate Cabinets
Laminate cabinets are made from pressed wood or particleboard that is covered with a thin layer of laminate material. They are more affordable than solid wood cabinets but can be tricky to paint due to their non-porous surface.
To paint laminate cabinets, you will need to use a primer that is specifically designed for laminate surfaces, such as an oil-based primer with strong adhesion properties. After priming, you can use latex or oil-based paint to achieve a smooth and durable finish. Make sure to sand lightly between coats for a professional-looking result.
Oak Cabinets
Oak cabinets are a type of solid wood cabinet made from oak, a dense and durable hardwood. They are characterized by their distinctive wood grain and are highly valued for their strength and timeless appeal. Painting oak cabinets can be challenging because the wood grain tends to show through the paint if not properly prepped.
To paint oak cabinets, you will need to use a wood filler to level the wood grain before applying a coat of oil-based primer. Once the primer has dried, you can use either latex or oil-based paint to complete the paint job. Be sure to sand lightly between coats to achieve a smooth finish that will last for years.
Preparation Stage
Before you start painting your RV cabinets, it's crucial to prepare them properly.
Clean and Degrease
First, you need to clean and degrease your RV cabinets to remove any dirt, grease, or grime that may have accumulated.
You can use a product like TSP (trisodium phosphate) or a solution of warm water and dish soap to clean the surfaces. After cleaning, give the cabinets a thorough wipe-down with a damp cloth, ensuring no residue is left behind.
Sanding Procedure
Next, you'll need to sand the cabinets to create a smooth surface for the paint to adhere to properly. Start with a 180-grit sandpaper and progress to a 220-grit sandpaper for an even smoother finish.
During this process, you can also use liquid sandpaper to make the surface as smooth as possible. Sand the cabinets gently, making sure not to damage the wood or remove any wood filler that may have been applied.
Priming The Cabinets
Before painting, you'll need to prime the cabinets with a high-quality primer like a gripper primer or a stain-blocking primer. These primers will improve paint adhesion, create a more even paint job, and prevent any wood stains from bleeding through the paint.
A bonding primer is also a good choice for maximum adhesion, especially for siding surfaces. Apply at least one coat of primer, and sand lightly between coats if necessary.
This table shows the primary type paintings:
Taping Off Areas
Finally, before you start painting, use painter's tape to protect the areas that you don't want to paint, like windows, floors, and appliances. Be sure to press the tape down firmly so no paint seeps underneath. It's a crucial step in achieving a clean and professional-looking paint job in your RV cabinets.
Additional Tips and Techniques
In this section, we'll discuss some extra tips and techniques to ensure you get the best results when painting your RV cabinets. We'll cover topics such as handling cabinet doors and drawers, painting RV interiors, and making over your RV bedroom. Let's jump right in!
Handling Cabinet Doors and Drawers
When painting RV cabinets or RV interiors, it's essential to remove all cabinet doors, drawers, and hardware.
Number the items and their placements using painter's tape to make the reassembly process easier. Also, lightly sand each surface, then clean using a liquid sander or a damp cloth to remove dust.
RV Interior Painting
As you work on your RV interior, you may need to use different types of paint for various surfaces. Utilize latex paint for the majority of the wood surfaces, but consider using oil-based paint for extra durability in high-use areas.
Remember to apply a good quality primer before painting, and allow each coat to dry completely. Lightly sand and wipe clean between coats.
RV Bedroom Makeover
Transforming your RV bedroom can be as simple as repainting the cabinets and walls. Choose a calming, cohesive color palette and use high-quality paint to ensure lasting results.
For a personal touch, consider adding new hardware, curtains, or accent pieces to make the space feel more like home. Don't forget to give it enough time for the paint to fully cure before reassembling the room.
Painting RV Walls
Painting your RV walls can dramatically change the look and feel of the space. Begin by prepping the walls, which may include filling any holes or cracks with wood filler, sanding, and cleaning. Use a paint with a semi-gloss or satin finish, which will be more durable and easier to clean. A paint sprayer or quality roller can help you achieve a smoother, more professional finish.
Safety Painting Measures
Safety is a crucial aspect when painting RV cabinets, and it involves several key elements. By following these safety guidelines, you'll create an environment that is not only safe for you but also ensures that your end result meets the desired expectations.
Use of Gloves and Safety Equipment
When handling paints, primers, and other chemicals, it is essential to wear gloves to protect your skin from contact with the substances. It is also advisable to wear goggles, masks, and other protective gear while working on your RV cabinets to prevent any harm to your eyes and respiratory system. Apart from that, don't forget to keep the painting equipment organized and out of reach for children and pets.
Proper Ventilation
Since most paints contain volatile organic compounds (VOCs) that can cause respiratory issues, it is crucial to ensure proper ventilation during the painting process. Open all the windows and doors in your RV and place fans strategically to create good air circulation.
This will help to dissipate paint fumes and maintain a healthy work environment. It is also a good idea to take breaks and step out of the RV to get some fresh air.
Safe Disposal of Materials
After completing the paint job on your RV cabinets, you should properly dispose of the leftover paint, brushes, and other materials.
According to painting guidelines, it is crucial to refer to your local regulations for waste management to ensure that you're safely disposing of hazardous waste. Some common best practices include sealing paint cans tightly, storing them in a cool and dark place, and never pouring leftover paint down the drain.
Finishing Touches
After successfully painting your RV cabinets, it's time to focus on the finishing touches that will elevate the overall appearance of your RV's interior. This includes reinstalling hardware, adding decorative elements, and considering interior design ideas.
Reinstalling Hardware
Once the paint has dried and the cabinets look perfect, it's time to reinstall the hardware. This includes attaching the hinges, handles, and any other accessories you may have removed during the painting process.
If you choose to keep the original hardware, you can simply reattach it, or you might consider painting it for an updated look. Alternatively, you could replace old hardware with new pieces to give your RV cabinets a fresh and modern appearance.
Decorative Additions
Adding some decorative elements to your newly painted RV cabinets can enhance the overall aesthetic. You may choose to apply decals or stencils to the cabinet doors or maybe even use a chalk paint technique for a rustic effect.
You could also consider adding trim or molding to the cabinets to create a more custom, high-end look. Let your creativity shine as you add your personal touch to your new and improved RV cabinets.
Interior Design Ideas
Now that your cabinets are updated consider taking a step back and looking at the entire RV interior design. Fresh and modern cabinets can inspire a cohesive and stylish interior makeover.
You might decide to update or replace the vinyl flooring to complement the new cabinet color or choose new curtains or upholstery that ties in with the updated cabinetry. Keep in mind the space constraints of an RV as you explore your design options, prioritizing functionality and storage while also making it aesthetically pleasing.


